The Voices
Introduction
Victoria Jack ran sessions for foreign students in which the students workshopped the creation of a collection of tips to help people whose first language was English, when they were talking to people whose first language wasn't English.
The tips included speaking slowly and clearly, using simple language, and avoiding slang, amongst others.
Victoria wanted to share these tips more widely around the university, and to engage more people in thinking about what it's like to be here in York from all around the world. She also wanted to to use the students' tips as as a part of similar future sessions, but also wanted to "get students moving" as part of the session, to bring a little life and fun into the activity.
What We Did
Working with Tom Smith in the DISC team (who help people thinking in thinking digitally and creatively with regards to their research, teaching and office work), they planned to create a simple Augmented Reality gallery that displayed talking head videos of the students sharing their tips.
Recording The Videos
The first step was to record very brief videos that were scripted and performed by the students. We doubled up the videos in a split screen to create a slight aurally disjointed experience similar to how it feels when listening to an unfamiliar langage. We used digital cameras just because we needed to ensure we ended up with all the videos, but realistically the students' own phone had video cameras that would have been as good. We edited the videos split-screen style in Adobe Premiere, but could have used the free ClipChamp because our videos were very short.
We recorded the videos in the Spring Lane building because it was quiet at the time, and the classrooms have nice colourful backgrounds.
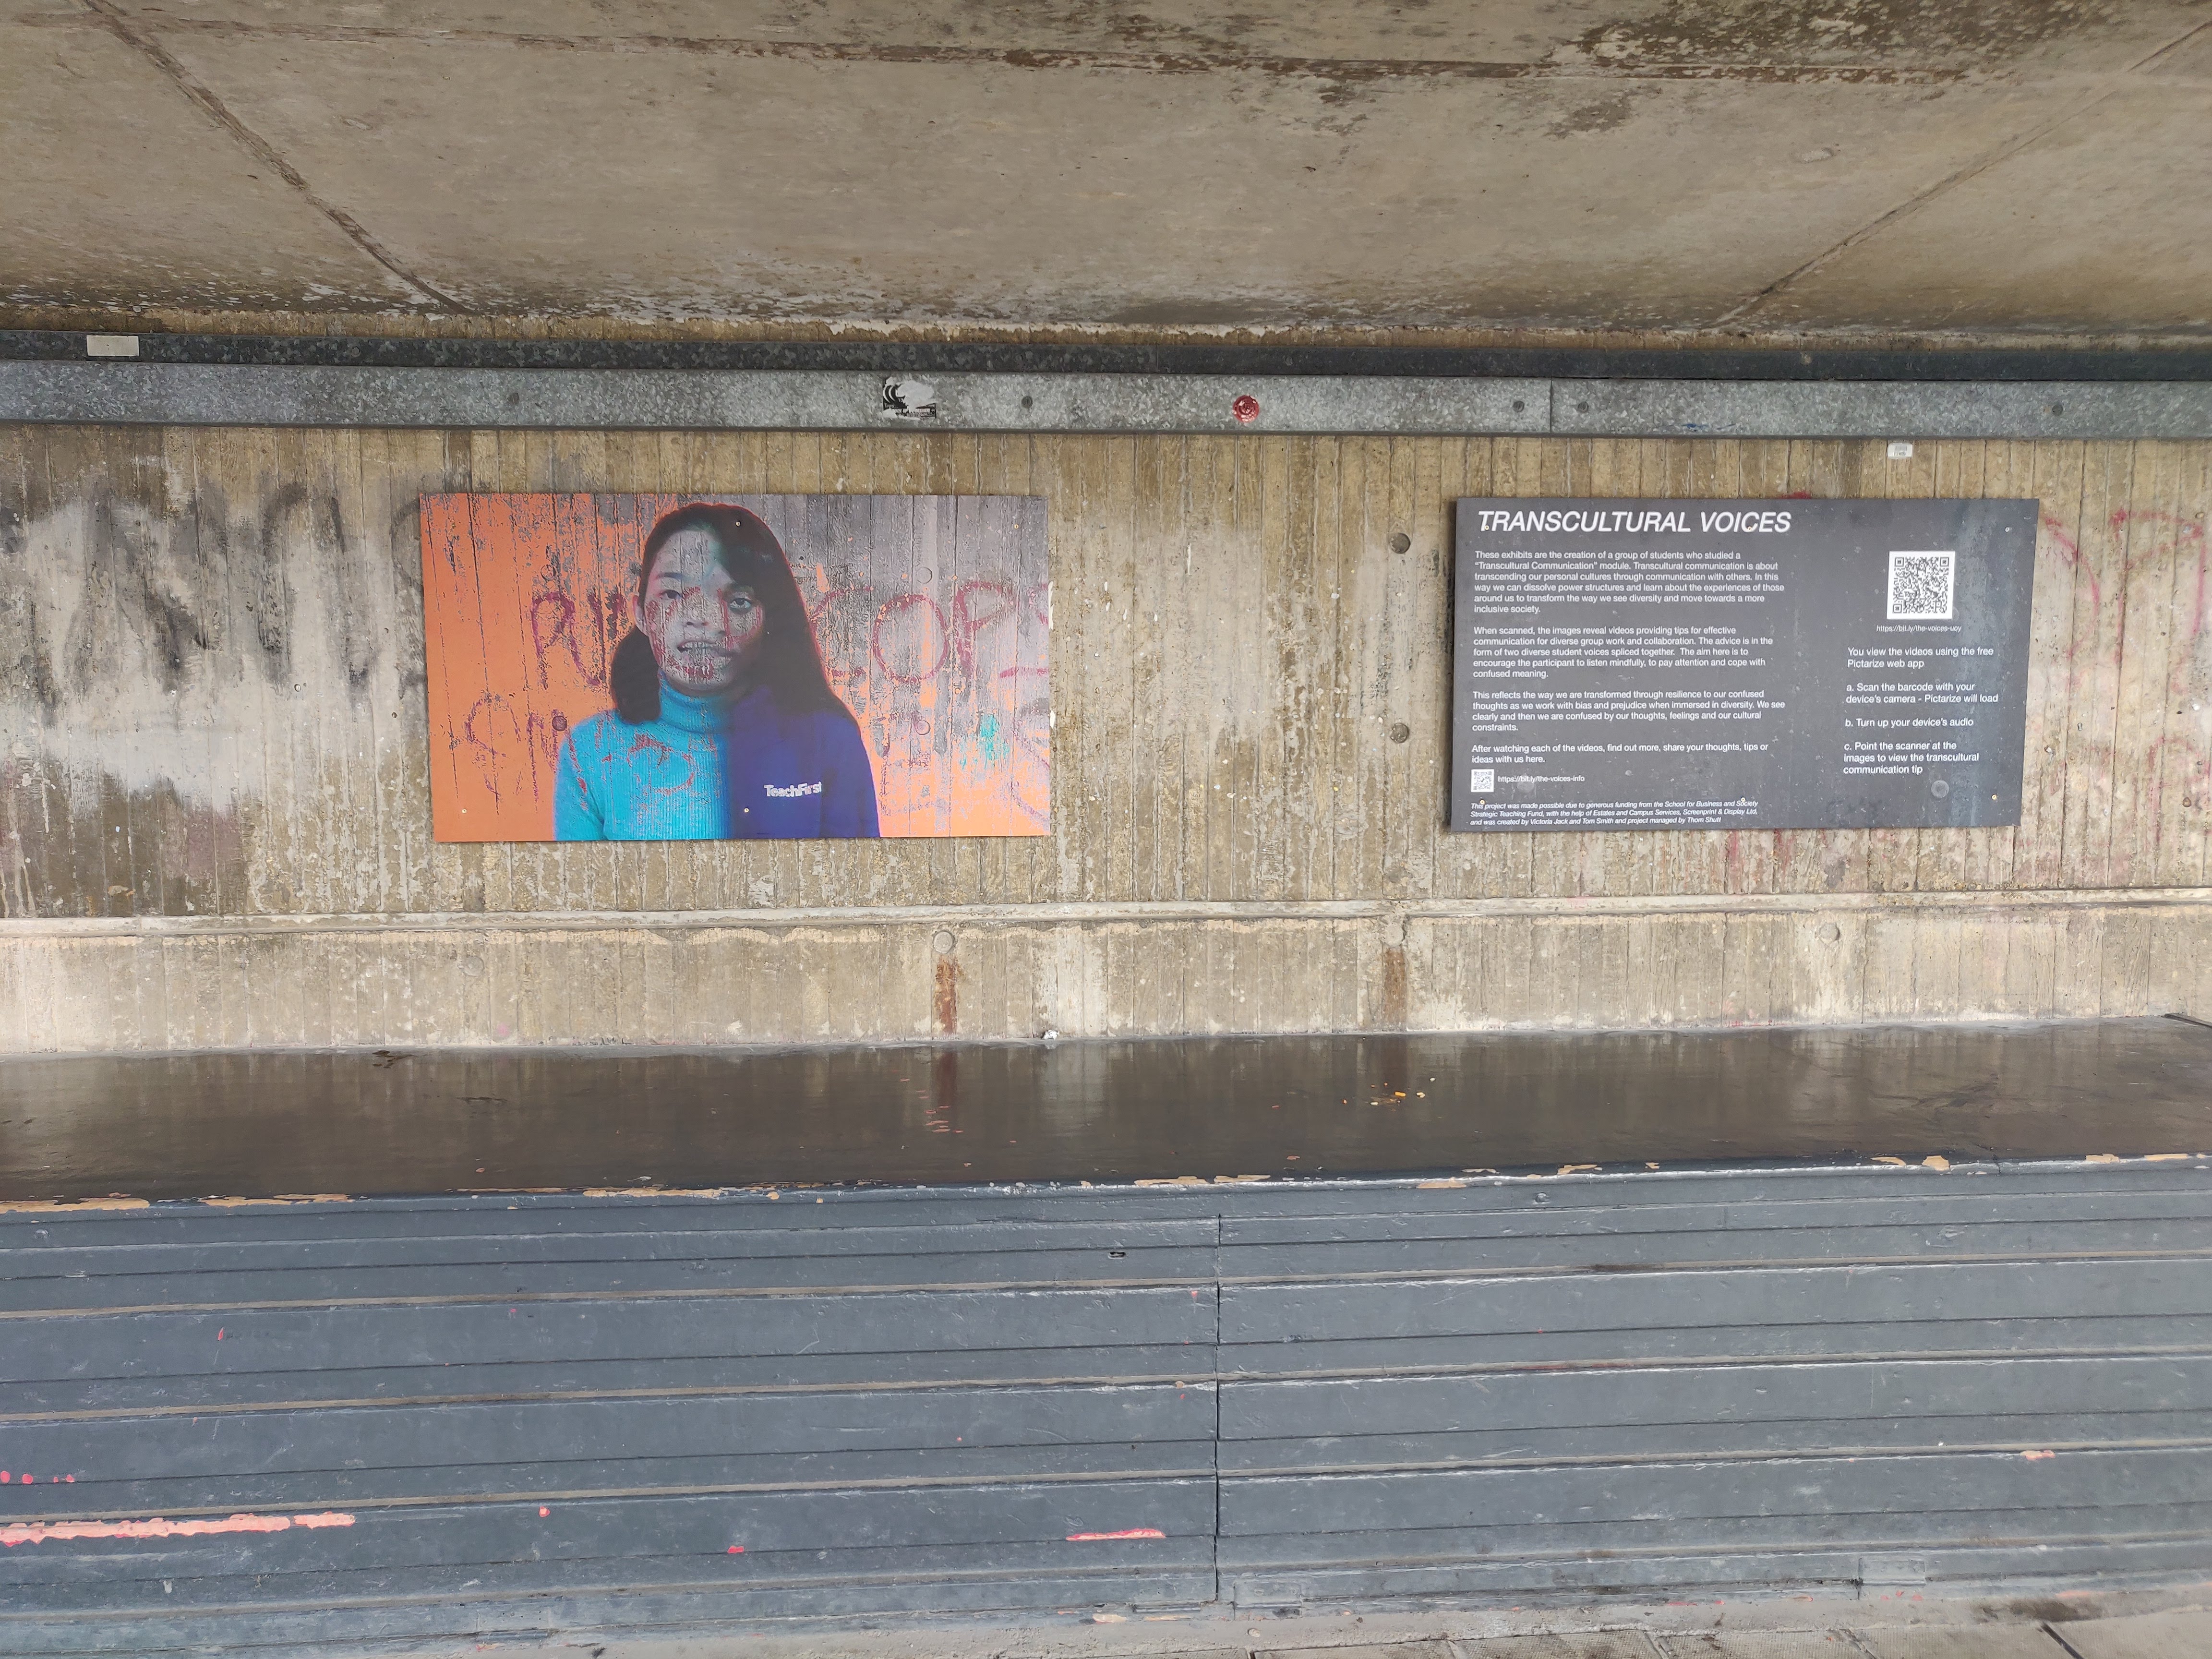
Once we had found the site for the gallery under Vanburgh bridge, the images were blended with the bridge wall. This was partly to tie the image to the space, but it also did the job of making the images - which were just frames from a low resoulution video - a bit more interesting, hiding their low quality when blown up to A0.
Assembling the AR
Initially, we used a nice but paid tool called Wikitude to assemble the Augmented Reality which requires two things, a trigger image that a person's phone camera recognizes, and the media that you want to overlay when a passing user points their phone at the trigger image. In our case, the image was the first frame of our video, and the media we wanted to display was the edited student videos.
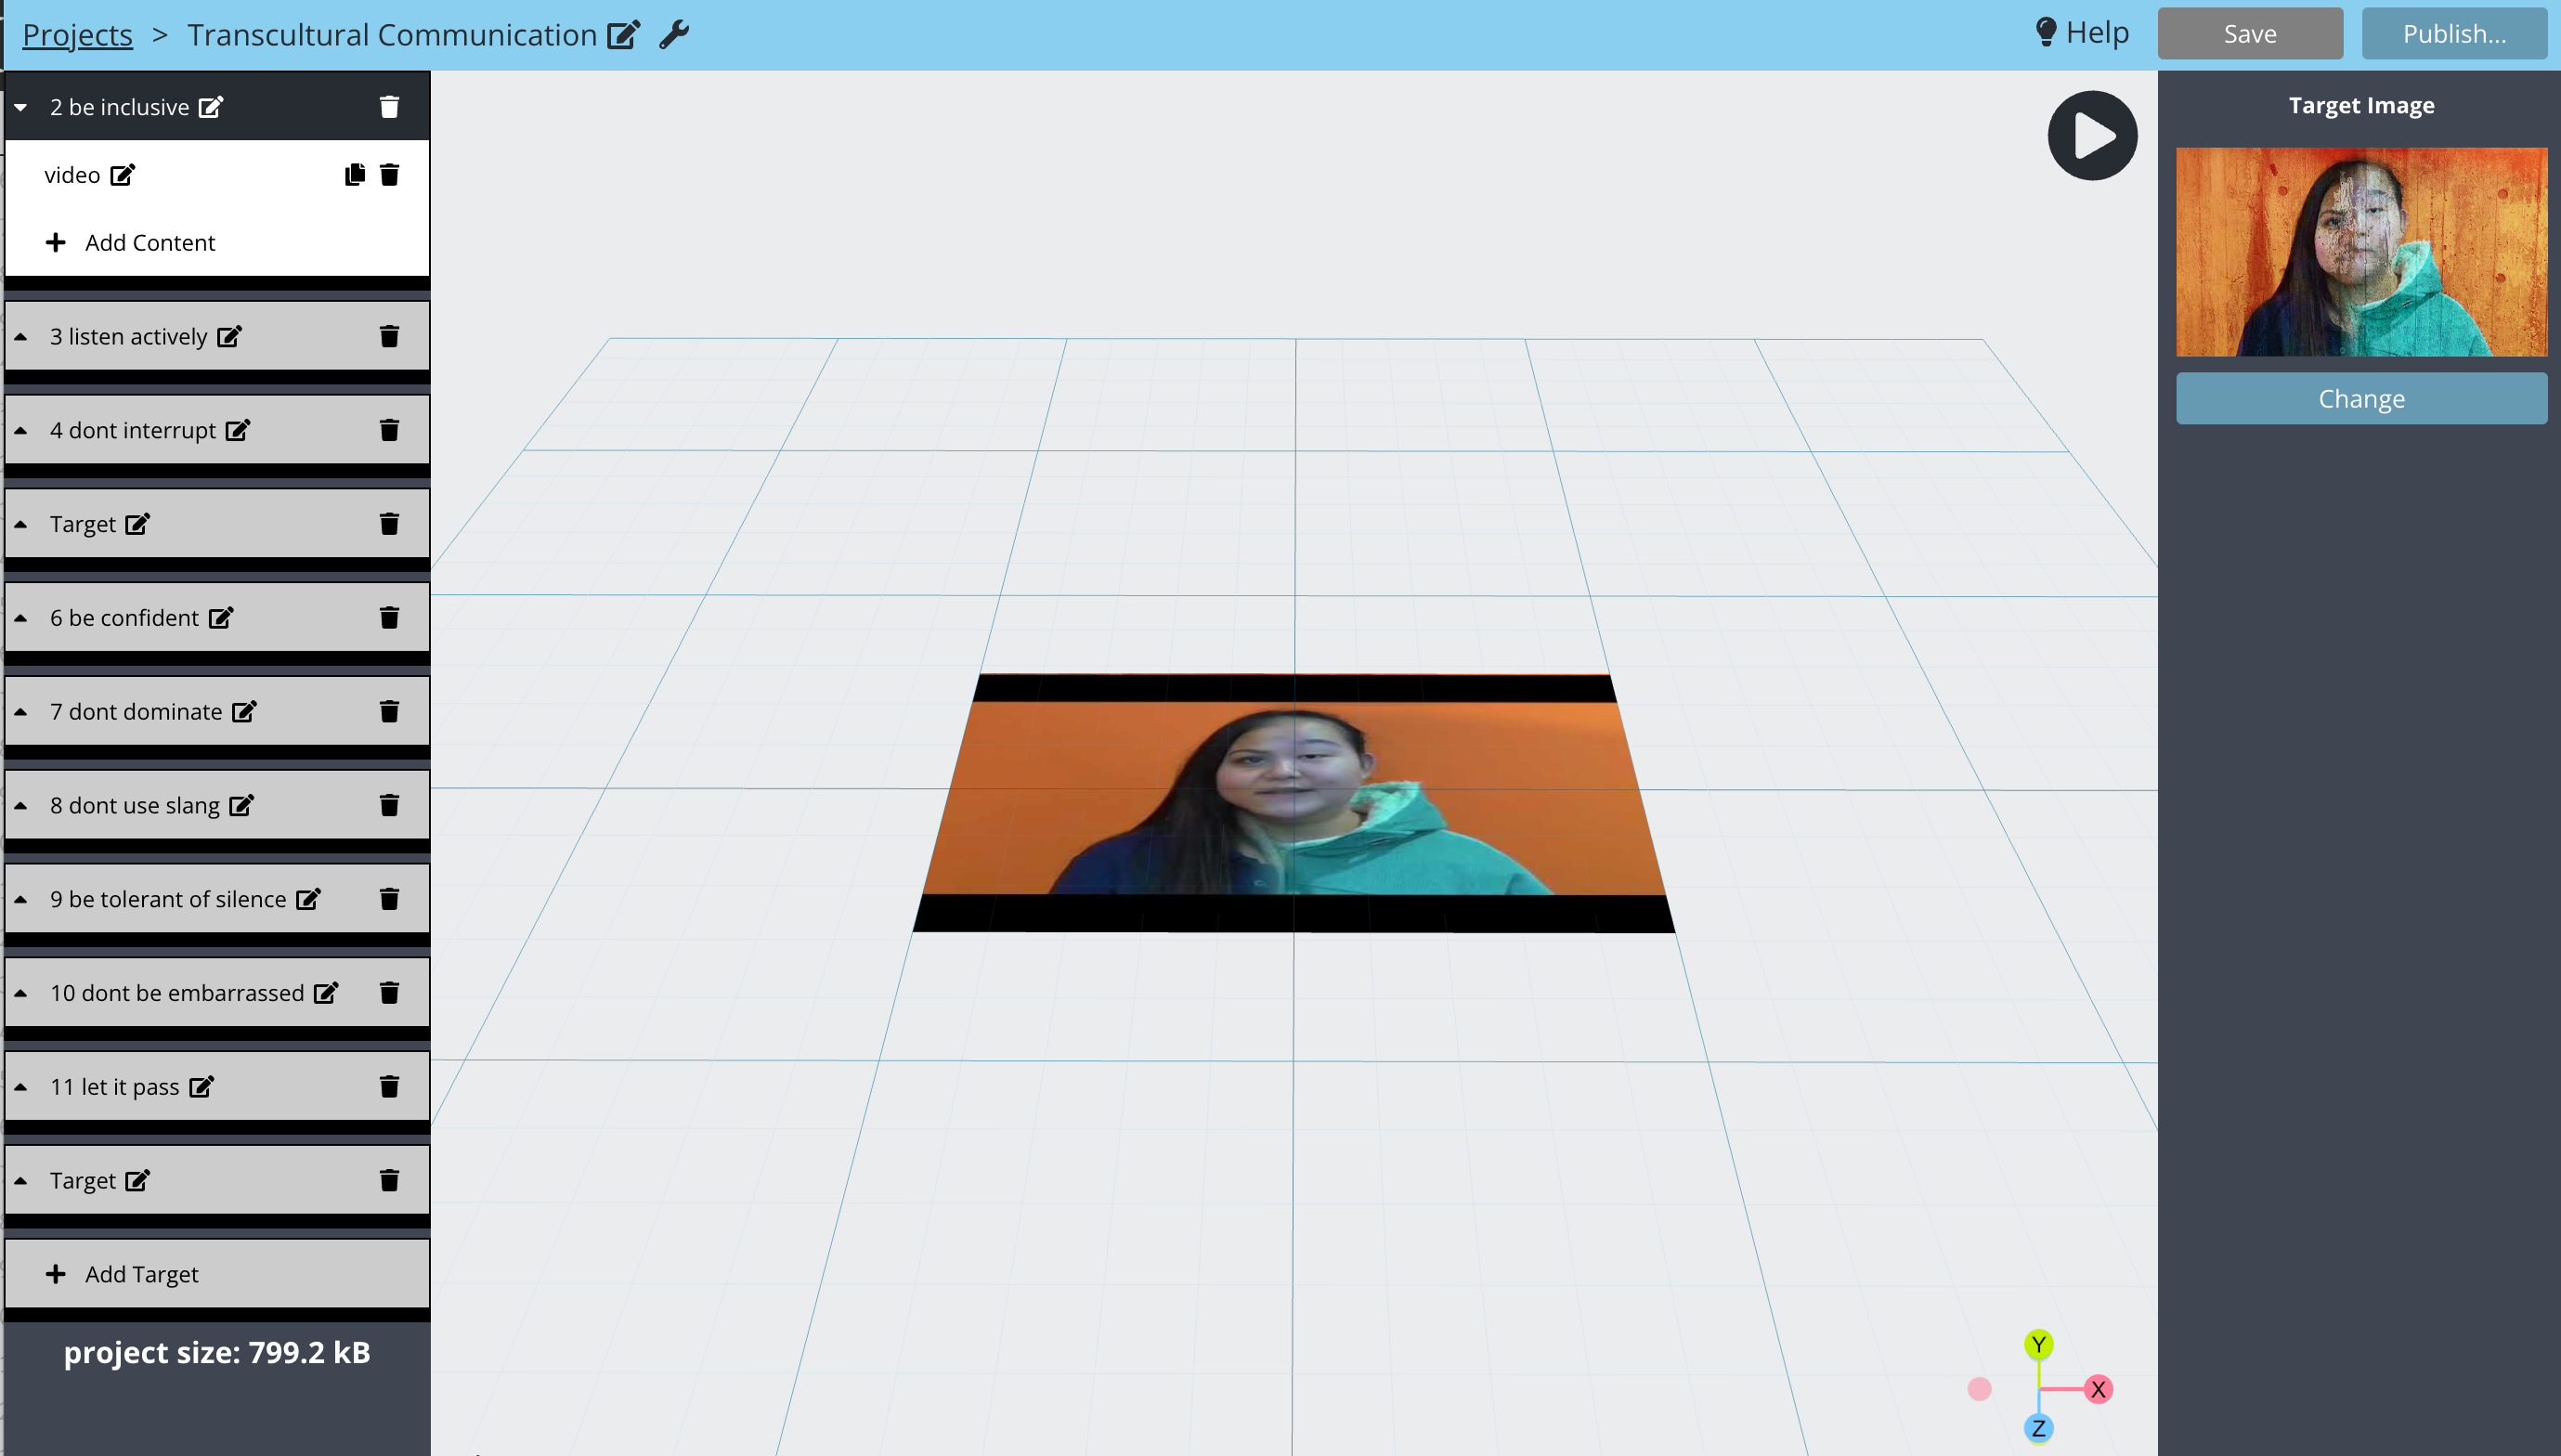
Wanting to get rid of Wikitude's subscription, we later found a free web-based tool called Pictarize, and so quickly re-built the same "app" so we could present it longer term and for free. The creation of the AR experience is very simple, anyone could do it. We could have chosen to also overlaid text, 3D models, images or sounds. We stored our videos on Youtube.
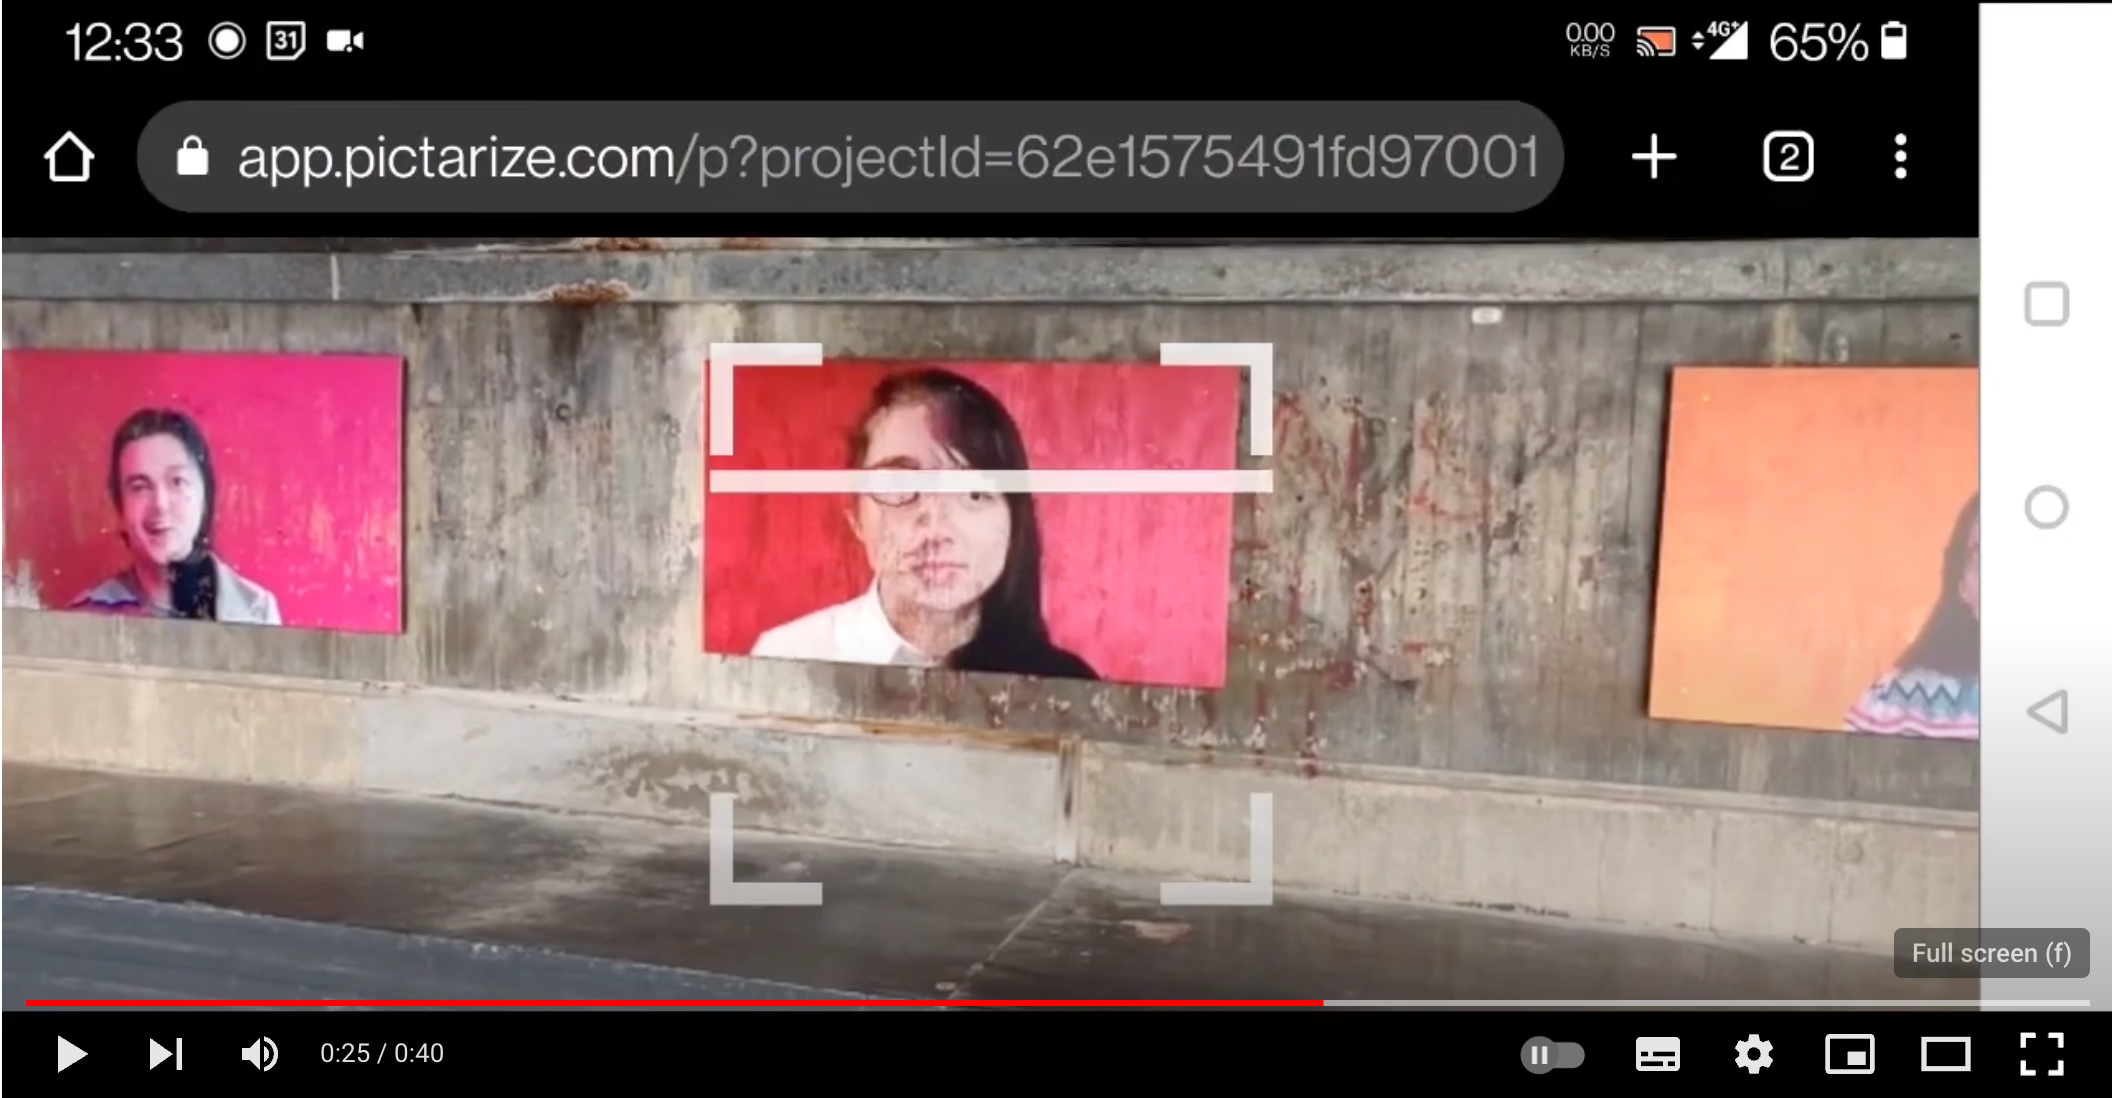
Once your Pictarize AR project is created, you are given your project QR code that opens the app, opens your phones camera, scanning for your trigger images. Although Pictarize is slightly less sophisticated than the paid alternative, it doesn't require installing any apps as it is entirely web-based.
Installing the gallery
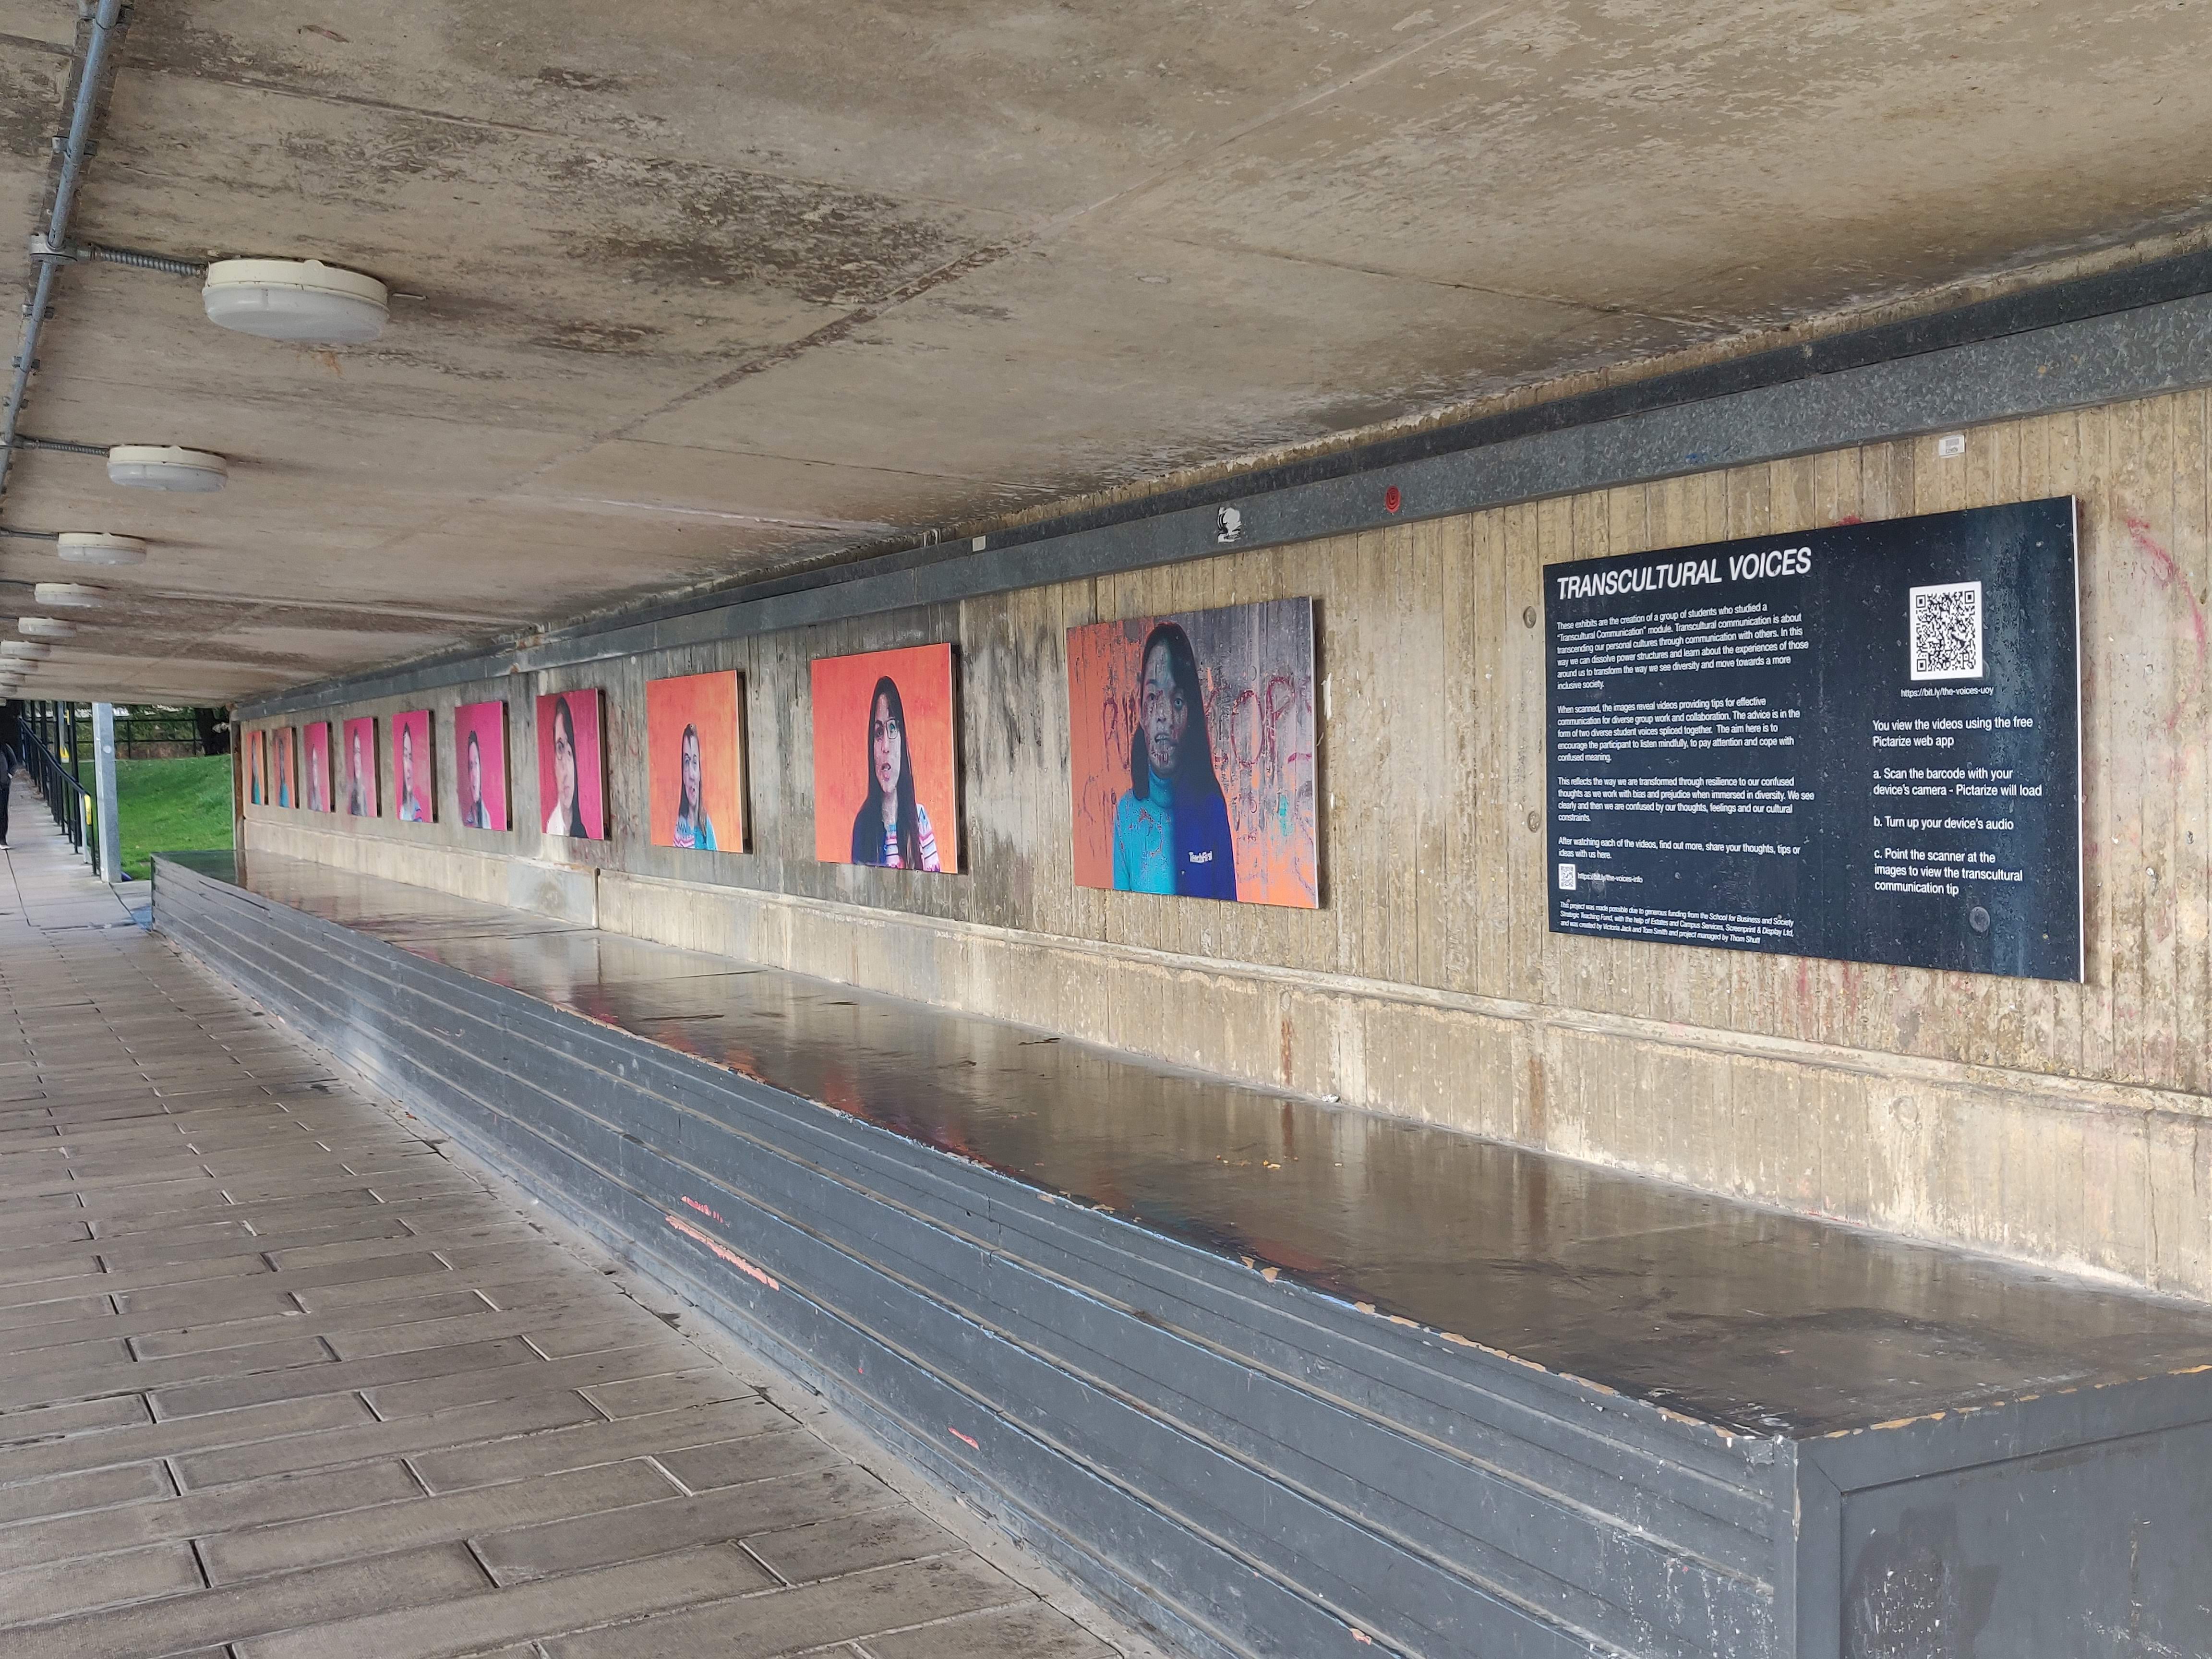
Once our AR project was finished, Thom Shutt project managed the hanging and creation of our works. We found a local company Screenprint & Display, willing to sponsor us to print our trigger images in a large format, and looked for somewhere to put them. We explored some out-of-the-way parts of campus looking for what you might call "non-spaces", slightly unloved and in-bewteen-y places where we might ask for permission to site our gallery and get a "yes" from the University.
Alhough we found many potential "gallery sites", we settled on Vanbrugh Bridge which was covered and would catch lots of passing people.
The campus Estates team, as ever, were enthusiastic and extremely helpful in hanging the work, which was printed on Foamex to withstand the elements, and also look good. The Estates created the bespoke structures to mount our images, and mounted them for us.
If you want to experience this work, head to Vanburgh bridge and point your phone's camera at the barcode on the informational panel, and then scan the images with your volume turned up.
Conclusion
This project had lots of fun and valuable threads, including:
- We got students a LOT more involved that they would have been creating a Powerpoint slide deck that nobody would ever would see.
- The students learned about how approachable alternative creative tools can be and had lots of fun making the videos.
- The students not only had interesting discussions, and created tips they wanted to share, but got to see their tips "out there" in the very fabric of their university.
Victoria created a resource, that other teachers could use, that was fun to take part in, get out there walking.
Want to get involved in similar projects?
If you have an idea, or even if you don't but want to bring a little digital creativity to your work, get in touch with the DISC team via itsupport@york.ac.uk and we will see if we can help. We regularly run sessions on working with data, media and coding and can work with your department too.